
HELPFUL TIPS FOR HOME FENCING
By Eugénie Bisulco
So you want to try a new fence around your property, but you aren’t sure where to begin. There are myriad styles and materials to consider — along with the height, placement, and, of course, your budget.
The first thing to decide is what your real purpose is and to prioritize your needs: defining borders, protecting your pets, or adding privacy are all likely reasons for installing a new fence. In most cases, multiple purposes will be served with one border, and it’s not unheard of to use a combination of types depending upon what part of your property is being fenced.
Keeping in mind that your neighbors and your community will also be affected by your selection, it will be important to consider their interests, such as leaving their views unobstructed, as well. Before beginning work, always study property drawings or order a new survey to be absolutely sure where your property lines begin. A new survey will cost between $500 and $1000, but it is worth the cost to ensure that your fence does not encroach even an inch upon your neighbor’s property. Once constructed, moving the fence back is a costly hassle no one should have to endure.
Always have a conversation with your neighbors first and be mindful of local laws with respect to sidewalk proximity, fence height, and other issues. In New York City, no permits are required for fencing (or hedges) up to six feet high, but if you have just cause to put up higher fences (due to street noise or other disturbing activity), you or your fencing contractor can apply for a permit at www.nyc.gov/nyc-resources/. Whatever height you select, it is common courtesy to make sure that the finished side of the fence goes outward.
Next, climate and location must be heavily weighed. Due to our cold climate, concrete anchors need to accompany fence posts, at least 36 inches deep to avoid cracking in freezing temperatures. In wet areas, wood fencing might be a poor choice, because it is subject to rot and warping.
Generally considered the most economic choice, chain link fencing is made of galvanized steel wire that comes in rolls in a variety of gauges. It runs from 3-12 feet high. The smaller the gauge, the heavier the wire. Chain link fencing may not be the most attractive choice, but it is certainly utilitarian.
Another common sort of fence is wood panel, which is usually made of cedar, pine, redwood, or spruce. The panels can be stained, painted, or left natural. They come in pre-assembled sections that are 6-8 feet long, 4-6 feet tall, and either dog-eared or pointed. Due to wood’s propensity to warp, it will inevitably require some attention. If you opt to leave it natural, you may want to consider adding a sealant for protection.
You might instead choose vinyl fencing, which is easily maintained. Like wood paneling, vinyl comes 4-6 feet tall. It is also rackable, which means that if there are slopes on your property, the panels can be adjusted up or down.
An unusual look for this part of the country would be split rail or post and rail fencing, which typically creates a rustic or “country” atmosphere and is almost purely aesthetic as it won’t keep animals or people on or off your property. Still, it’s an attractive option that will define areas as well as any other, resting 3-5 feet off the ground and available in a variety of materials.
There are materials and types of fence for every personality and budget, and there are even styles that can be installed by the average fence-naïve homeowner. Whether you opt for chicken wire or bamboo, modern sculptural fencing or traditional-looking decorative metal, seek out a reliable local fence installation contractors and businesses that can help you get exactly what you want.
**********
HOW TO COOL YOUR HOME WITHOUT BREAKING THE BANK

CAPTION: A combination of ceiling fans and splits can help cool a home very efficiently. Make sure fan blades spin in the right direction for the season.
Mother Nature is consistently inconsistent these days, when 30-degree Mondays might be followed by 60-degree Tuesdays. Fickle weather is often accompanied by large fluctuations in temperature, strong storms and unseasonable conditions, making it difficult for homeowners to maintain comfort levels in their homes.
As a result of fluctuating temperatures, home heating and cooling systems have been heavily taxed. Growing reliance on HVAC systems has also driven up energy bills, as moderate weather synonymous with spring has given way to more days of extreme heat or extreme cold. As summer approaches once again, reducing cooling costs is a priority for many homeowners. The following are a few ways to cool your home’s interior without causing a spike in your energy bill.
- Reduce sun exposure. Much of the hot air inside of a home can be attributed to sunlight exposure throughout the day. Walls and windows on the south and west sides of a home will bear the brunt of the sun’s rays, so close shades and drapes on this side of the house to maximize coolness. Shades and curtains can save you up to 7 percent on your bills and lower indoor temperatures by up to 20 degrees. Homeowners also may want to think about installing a retractable awning on areas of the house that get a lot of sun. Planting shade trees is another way to naturally cool down hot sides of the house.
- Draw more air into the attic. Hot air rises, and in the summertime hot air can get trapped beneath the roof in the attic and eaves of a home. While an attic should have vents, homeowners can speed up the exchange of hot air with a simple trick. Open up a window on a shady side of the home, and then open the attic door or take out the access panel and place a box fan inside to blow air up into the attic. This will disperse the hot air and help force it out through the vents.
- Use fans productively. Using box fans to suck cool night air in from east- and north-facing windows and to push out hot air from west- and south-facing windows is another way to increase circulation through a home. Set ceiling fans to rotate counter-clockwise. This will pull cooler air up from the floor and create a wind-chill effect.
- Switch to LED or CFL bulbs. Ninety percent of the energy used for incandescent bulbs is emitted as heat. This not only wastes electricity but also can make conditions hotter inside a home. Switch to cooler, more efficient light bulbs.
- Reduce humidity levels. Humidity makes hot temperatures feel even hotter. Clean laundry, take showers and run the dishwasher at night or early in the morning before the day heats up. Don’t forget to vent bathrooms and kitchens by turning on exhaust fans when water is in use.
- Rely on a programmable thermostat. Setting a thermostat to adjust the air conditioning system automatically means homeowners can keep the temperature raised when they’re nothome and then have it lowered shortly before they arrive home. The thermostat also can adjust temperatures for day and night use.
- Keep doors closed. Do not cool rooms that are unused. Maximize the cool air in lived-in spaces by blocking off rooms that do not need to be cooler.
- Invest in more insulation. Insulation does not just keep homes warmer in the cold weather. Insulation also prevents hot air from infiltrating living spaces while keeping cooler air where it’s needed. Sealant around windows and doors also will prevent unnecessary air exchange.
FORUM TIP: If you are considering a new heating/cooling system for your home, we suggest looking into a system which is comprised of units called mini-splits or splits. These units supply both heat and air conditioning. We have had them throughout the office for two years now and although their initial cost was much higher than conventional type units, we have seen a reduction in electric and gas bills of nearly 40% since their installation. In addition they are very easily maintained and feature easily removable filters for cleaning. They operate with virtually no noise and maintain true temperature better than any air conditioning or heating system we have used in the past including individual air conditioners, or central air units for cooling and radiator or baseboard units for heating purposes.
**********
CURB APPEAL AT ITS FINEST
By Patricia Adams
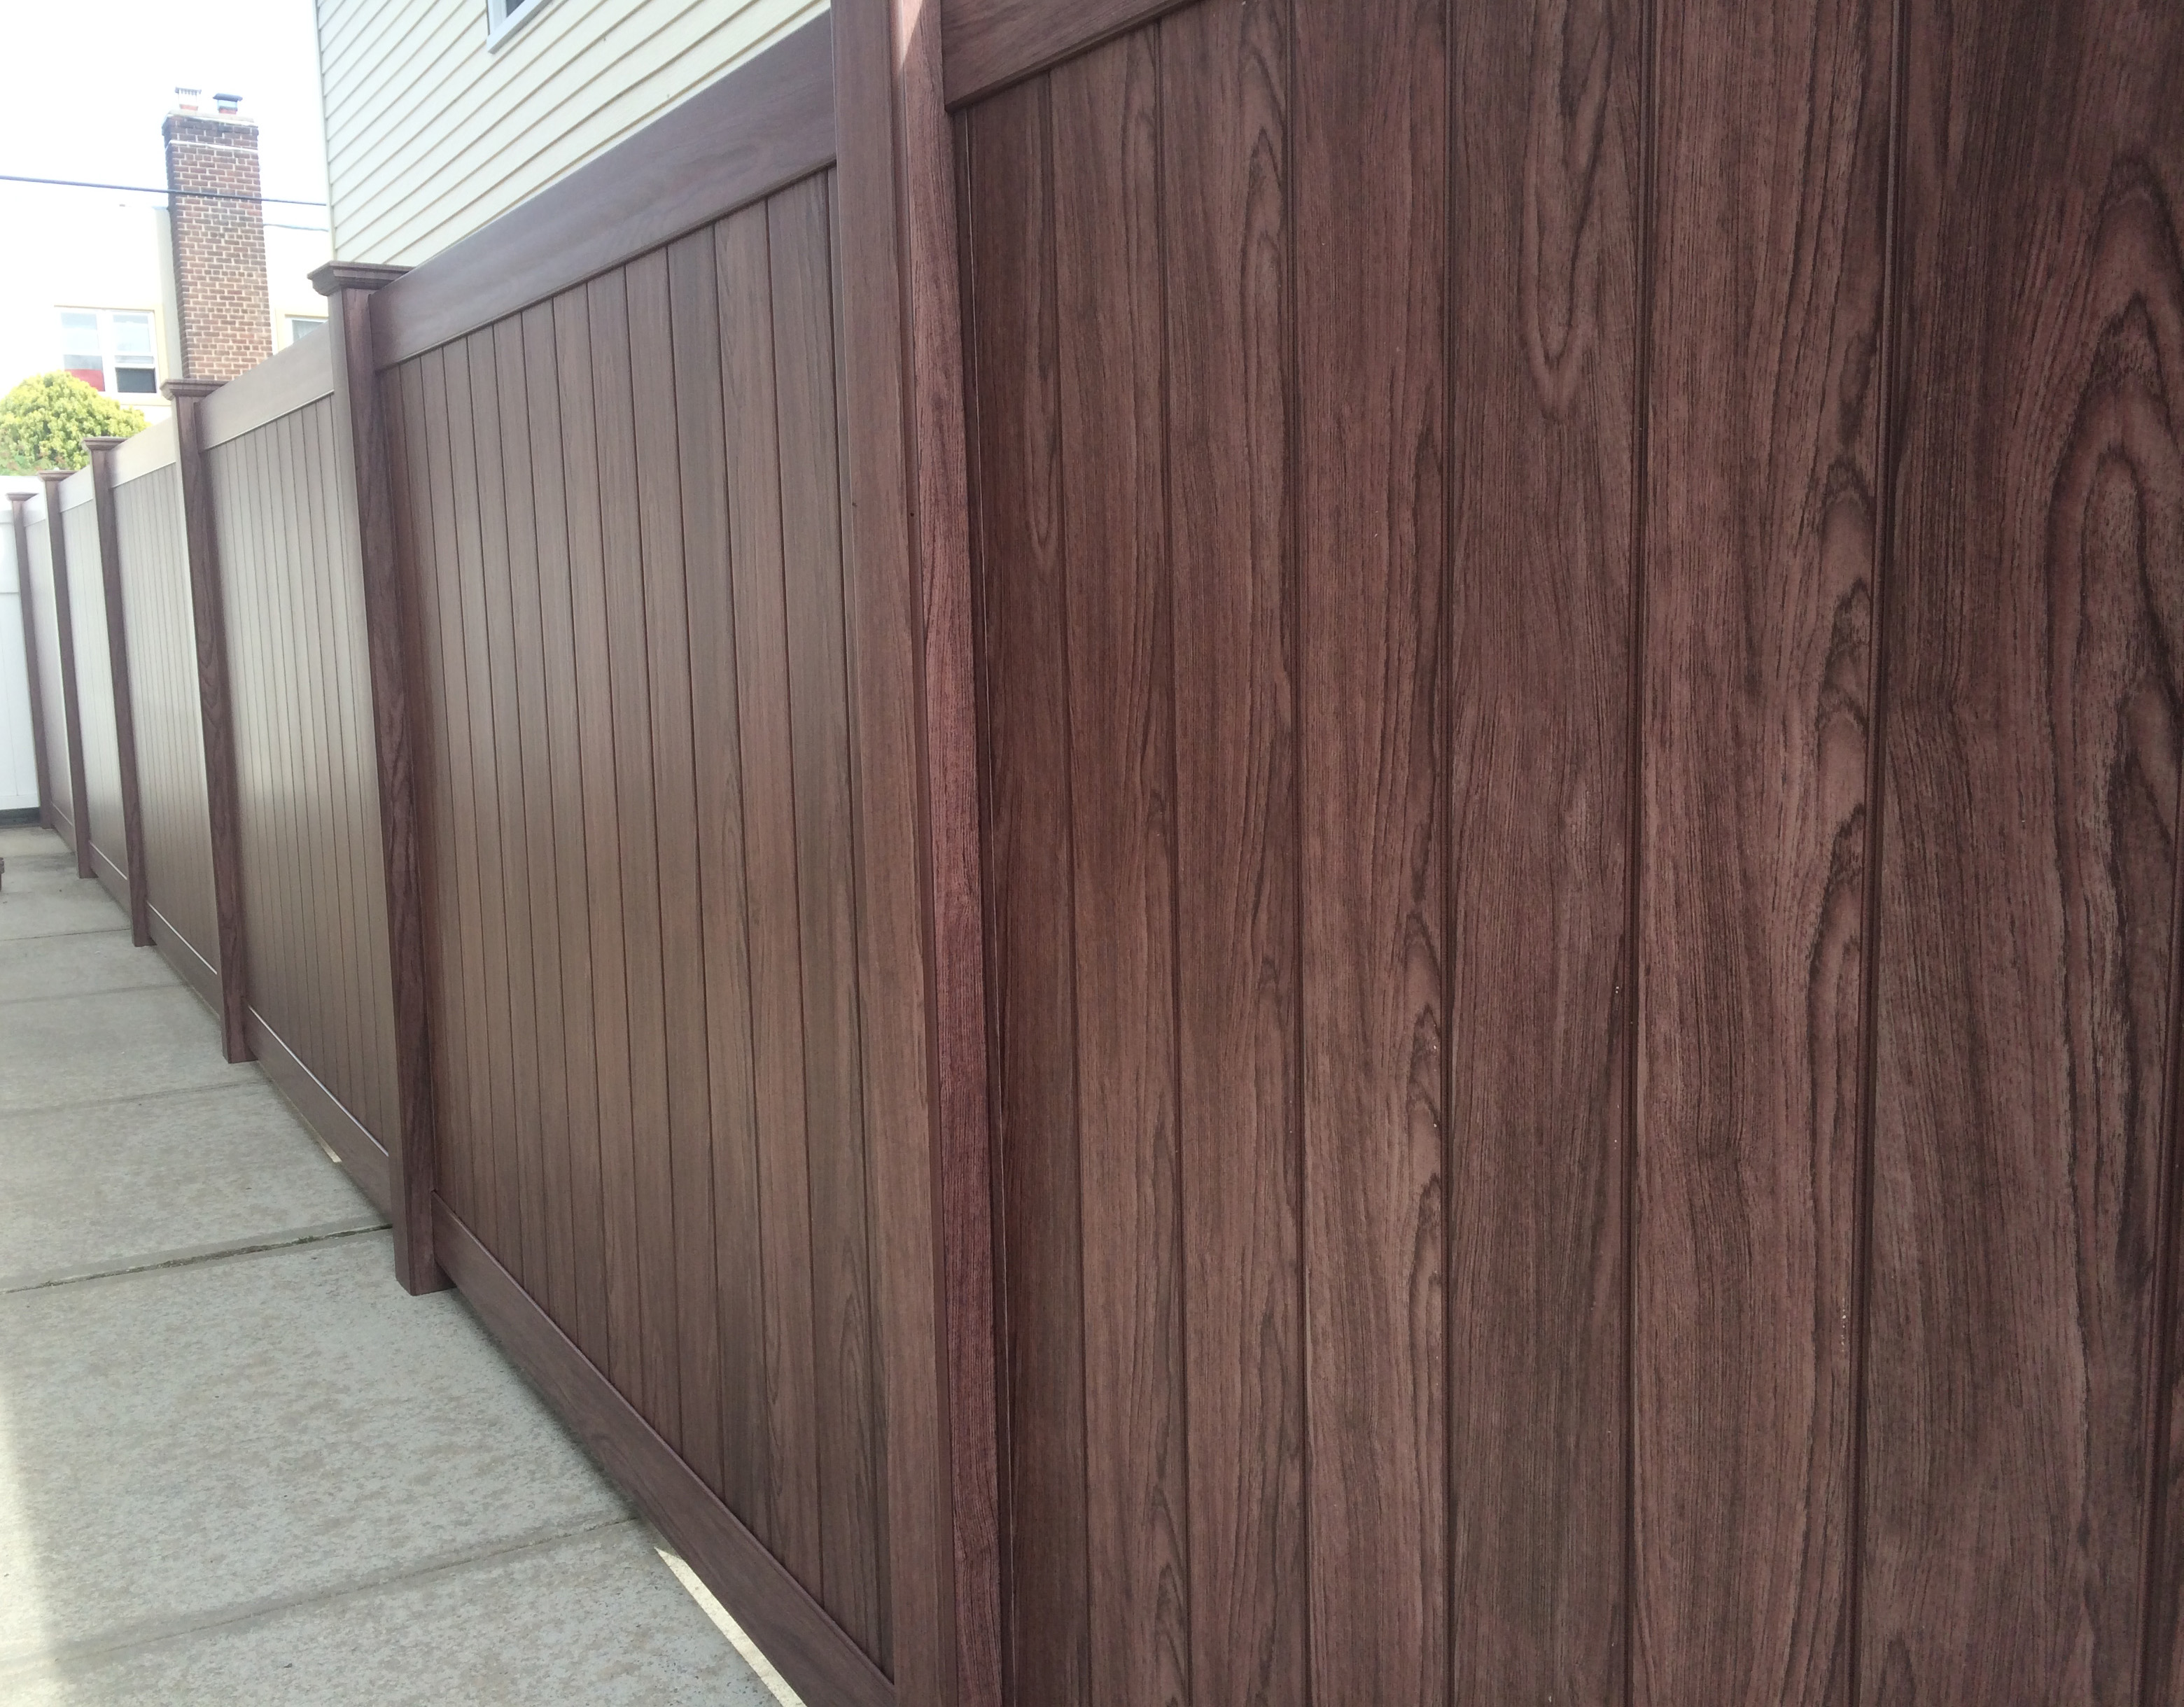
Among the beautiful new color choices available in vinyl fencing is an entire series of wood tones, including this rich walnut.

A sloped picket design adds an elegant touch to the gated sections of the fence.
While practically none of us wake up in the morning thinking about fencing, one could successfully argue that there is no better feature that you can add to increase the value and marketability of your home than a beautiful perimeter fence, made from top-quality materials and professionally installed and maintained.
The most obvious benefits of installing a fence include privacy, the clear identification of your property boundary, security around your home, and, of course, keeping a closer eye on children and pets. New options in materials and installation techniques can provide homeowners with many more opportunities to enhance their properties than ever before.
Gone are the days when choices were limited to chain link, wrought iron, wood, or white vinyl. Today’s market offers a spectrum of colors that rivals a paint chart, as well as wood grains made to look like the real thing, without the maintenance and woes that accompany wood and other materials.
For the purposes of this story we are going to confine our discussion to the most common fencing choice—vinyl–commonly referred to as PVC.
One of the best things about purchasing your fence and having it installed is that, armed with the right questions, you can choose your “fence destiny” and have whatever outcome for your home and your property that you choose.
Probably the single most important decision for the consumer is in selecting the materials. In purchasing a fence, virtually everything that’s important begins and ends with the material.
Efforts to save money will most often result in choosing a lesser-quality product that’s made with something called regrind, a ground, pulverized recycled material. While your fence might have a shiny new face when it’s first installed, you can certainly count on that look to fade, chip, peel, crack, and become brittle and warped long before its counterparts made with quality material.
Look for fence that is constructed with material subjected to stringent testing and certification. What this all adds up to is when using prime materials you can basically shed many concerns over extreme temperatures and the transitions that occur from season to season which have been known to cause irreparable damage to products manufactured with substandard material. Many unhappy homeowners have found themselves dealing with warping, corrosion, fading, and cracking before their new PVC fence even sees a full cycle of seasons.
There is only one thing actually that can screw up good fence material, and that’s poor installation. Even the finest of materials can be sent to an early grave with an inexperienced or lazy installation crew.
There are so many variables that the homeowner needs to look at when choosing an installer, and we’d like to share with you what you should make sure of before sinking your new little beauty into the ground.
Succinctly put, there are so many things that could go wrong — the exact placement of the fence, resolving property line issues, code adherence issues, the slope of the land vs. the type of fence, the type of soil, excessive tree roots, large boulders, wet soil, weather, underground wire or pipe, and worst case scenario of all – if an uninsured worker incurs injury on your property – that the money and aggravation you save in the long run, as well as the fence itself, will be well worth it if you look into these issues before getting started.
Here at The Forum we recently had occasion to install fencing around the office. After exhaustive shopping and research, we decided to purchase our fence from Citiwide Wholesale Fence in Kew Gardens.
Their American-made vinyl inventory is not composed of regrind, and their manufacture is subjected to the most stringent of testing. Citiwide had the most to offer in terms of selection as well.
We pride ourselves on always focusing on the benefit for our readers when offering opinions or endorsements of any product. We just don’t say they’re good because their advertising appears; they have to prove their worth to get our endorsement, and this is one company that really fit the bill.
From the start of our encounter with Citiwide, they met every mark—from outstanding frontline representation at the office, to their sales staff and installers. This is one company we don’t hesitate to recommend.
If you’d like to take a look at their handiwork along with some of the most beautiful vinyl fencing you’ve ever seen, feel free to pass by the office and take a look. And when you call Citiwide, tell them you read about them in The Forum, and let them know they’d better live up to their great reputation!
**********

**********
TIPS FOR HOMEOWNERS ON THEIR FIRST RENOVATION PROJECTS

Home renovations are typically exciting, as homeowners get to see the visions of their dream homes come to light right before their very eyes. Turning an outdated bathroom into a modern oasis or an empty basement into the ultimate man cave strengthens the sense of attachment homeowners have with their homes.
But few home renovation projects go from start to finish without experiencing a few bumps in the road along the way. Such bumps can be difficult to handle for homeowners working on their first renovation projects, but there are many ways for novices to navigate the sometimes murky waters of home improvement projects and come out relatively unscathed on the other end, where a newly renovated home awaits.
- Plan well and know what to expect. When working with contractors, get all agreements in writing and spell out exactly what you desire in a home renovation. Photo references can help guide contractors and architects. Ask for the full picture of what can be expected with the work, from demolition to the punch list. Knowing what lies ahead can keep you grounded throughout the project.
- Discuss work each day and set payment schedules. Make payments contingent on work completed. This can help keep contractors on schedule. Paying for all work upfront leaves homeowners at a disadvantage, as it does not provide incentive for workers to be timely and efficient. Check in with workers to get daily progress reports.
- Have reasonable expectations. A renovation project may exceed its budget and take longer than initially expected. Understanding that these potential setbacks might be part of the process will make it easier to handle them when the foreman speaks to you about any issues that arise.
- Accept the mess. Construction work is messy. There’s no way to maintain a pristine house when contractors are entering and exiting all day. Dust is bound to be generated, and tools can fill up rooms. A home in disarray can be stressful, but continue to visualize the end result and the mess won’t bother you so much.
- Establish a contingency plan. Bathrooms and kitchen renovations are typically the most disruptive home improvement projects. Going without a kitchen can make it difficult to enjoy meals at home, while a bathroom remodel may require you to navigate water shutoffs. If your project is scheduled to take several months, establish a contingency plan to deal with the consequences of your renovation project. Speak with family members about using some of their home amenities, and prepare and freeze meals in advance so you can reheat them later on when you don’t have access to your stove.
- Plan your escape. Sometimes the constant work and mess of construction is too much to bear. Afford yourself time away by visiting relatives or staying at a hotel. Even a single night away can provide the relief you need.
A home that is undergoing a remodel can be a less than comfortable environment. But homeowners who have never before lived through a renovation project can take several steps to make the process go as smoothly as possible.
**********
Landscaping Tips for the Beginner
By Eugénie Bisulco
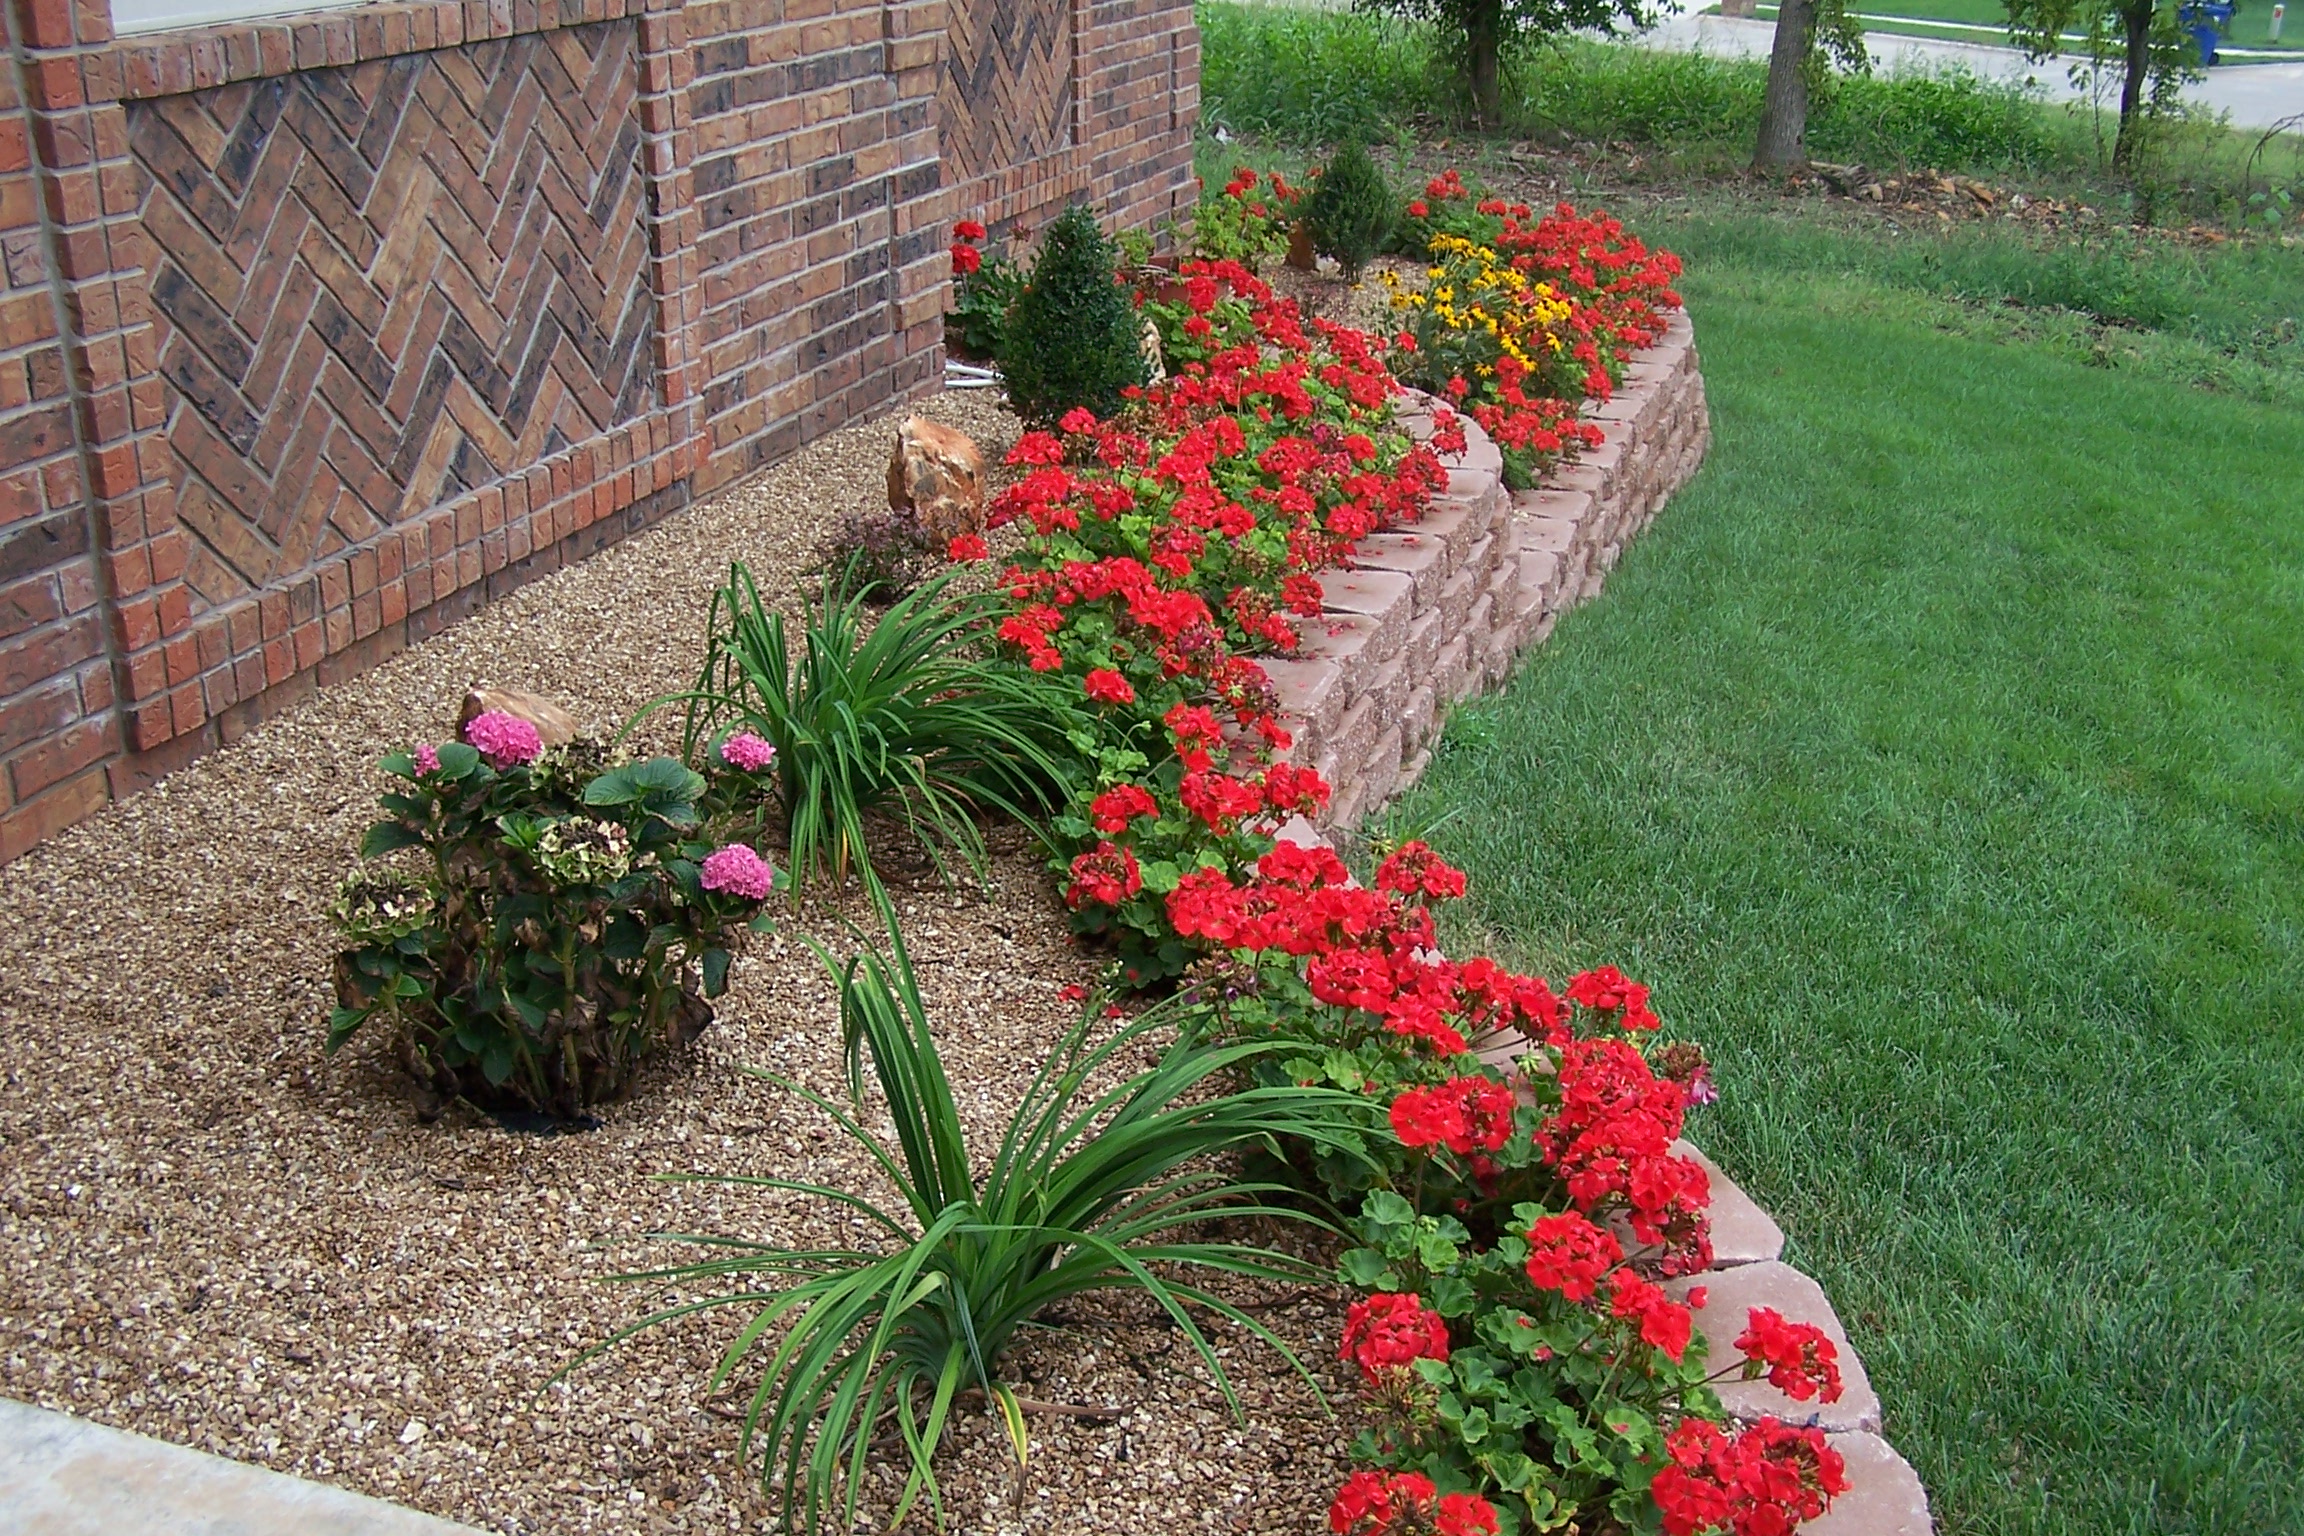
Starting out with something simple and relatively sparse is the best bet for beginning green thumbs. Using a combination of hearty groundcover and vibrantly colored flowers will yield a beautiful space
With a small piece of land, the novice gardener or even a brown thumb can sculpt out a couple of patches of interesting greenery.
The first thing to do when considering planting even the tiniest plot is budget – not just money budget, but time budget. How big of a project can you take on, either financially or within your schedule? Start small on both fronts, and buy your plants, bulbs, or seeds based on the season in which you have time to begin. Time on the front end, to find and buy the plants, as well as planting and maintenance time, should all be factored into your selection process. Even 15 minutes and $1.00, with no time for maintaining, weeding, and watering will get you four packs of wildflower and other seeds that you can scatter and leave to nature to transform your property.
Easy-grows like wildflowers are a good choice to plant when you haven’t figured out yet what you want long-term. Lettuce is another good garden-starter in early spring. While it can’t handle much heat, it grows quickly, and you’ll see a return in the form of fresh baby green salads in just a matter of two or three weeks. Another wise choice for temporary plants that grow easily and quickly and will cover an area with lush vegetation in little time is sweet potatoes. The plants themselves are hearty, dark green, and quite attractive. By the time you figure out what you want in the long run, you’ll have a harvest of tubers. Sweet potato plants pull out easily at harvest time and can be composted. Like small shrubs, they’re good if you’re prone to changing your mind frequently. In gardening, change is a good thing. Annuals, or plants that live for only one growing season, can always be rotated from year to year to see what works best. Even some perennials, or plants that last for more than two growing seasons, can be moved relatively easily, as long as their root structure doesn’t go too deep.
After you’ve got some easy filler-plants or flowers in, you can consider longer-term issues like drainage, water source, and sunlight. By simply reading the recommended sunlight, water, and climate on packaging, and/or speaking with nursery staff, you can choose the best spots for planting. If your existing soil is claylike or full of giant rocks, you’ll have to spend time to loosen it with a hoe or a tiller, depending on how large the area is. You can also add a layer of rich store-bought topsoil to make your job a little easier.
If you’re going to attempt amateur landscaping yourself, the key is to have fun with it. Ask yourself what you like. Group things according to scale, color, and light requirements, and play around with the variables as if you are creating a three dimensional collage.
For more ideas and tips on landscaping for beginners, visit Better Homes and Gardens at bhg.com, or simply make a trip to your local greenhouse, botanical garden, or plant shop.